The Yellow Belly Frog
Poppers: Step-by-step fly tying instructions

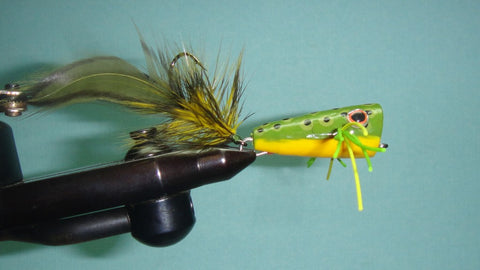
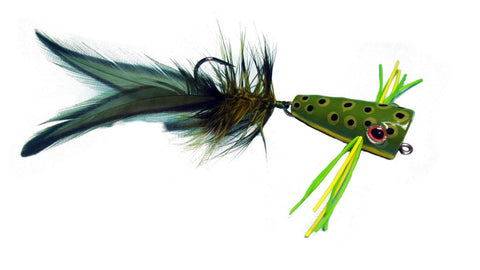
The Yellow Belly Frog by John Collins.
This articulated popper fly pattern has high movement and is tied hook-up to avoid snags. It helps you achieve a high percentage of hooked fish because the fish are no longer able to leverage a long popper hook shank in order to throw the fly.
This pattern demonstrates how the Fish-Skull® Articulated Shank™ can be used to add articulation to surface flies such as poppers and sliders. This is an exciting growth area in fly tying and offers significant advantages over the traditional methods of tying poppers.

Note: This is just one example of how Articulated Shanks can be used in the making of top water poppers. Smaller-bodied poppers can be mounted in the 20mm (3/4 inch) Articulated Shank, such as the one pictured above. Hook dressings and mountings (up or down) as well as popper body colors can be changed to fit your preference.
Fly tying materials
Thread: 6/0, olive green.
Hook: Mustad, C52S BLN #4.
Popper body: EZ popper foam, long bodied.
Shank: Fish-Skull® Articulated Shank™, 35 mm.
Front legs: Round rubber legs; 2 green and 1 yellow, medium.
Back legs: 2 Hen neck feathers; dyed olive.
Hook body: Hen neck feathers; 1 dyed olive, 1 dyed yellow.
Fly tying instructions
Step 1

Paint your popper body the color you desire, then heat a bodkin and push it through the body at a 90-degree angle. This will give you a hole through the body for your rubber leg.
Step 2

Insert a bobbin threader through the hole and then insert 3 medium rubber legs through the loop in the threader.
Step 3

Pull threader back by pulling rubber legs into body and out the other side so length is even with tips on the other side of popper body. Cut rubber leg loops with scissors and trim both sides so all legs are even.
Step 4

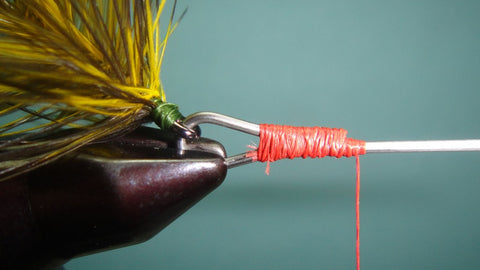
Put your hook in the vise and attach a hen feather on the far side of the hook, halfway down hook shank. Put the shiny side towards the hook with the tip curving outward from the hook.
Step 5

Attach feather on near side of hook with tip pointing out in opposite direction. After feathers are attached, cover hook shank completely with thread right up to the hook eye
Step 6

Attach 2 hen neck feathers, by the tips at the base of the feathers that were mounted in steps 4 and 5.
Step 7

Palmer hackle the two feathers together, covering the hook shank by winding forward to hook eye. Tie off and clip excess then proceed to tie a neat head.
Step 8
Attach dressed hook to Articulated Shank with point of hook mounted up. Mount shank in vise with clip side up and tie closed with with Kevlar thread. Hook should ride point up.
Step 9

Carefully squeeze some CA glue into slot on bottom of popper body.
Step 10
Take finished popper body and press down onto Articulated Shank. Make sure shank is completely embedded inside of popper body, with the shanks clip side up. This will keep the shank from spinning inside the popper body. Note: Dry fit body on shank before tying. You may need to make slot deeper and wider in order to fit properly over shank. This can be accomplished by running the slot over a hacksaw blade.
Step 11
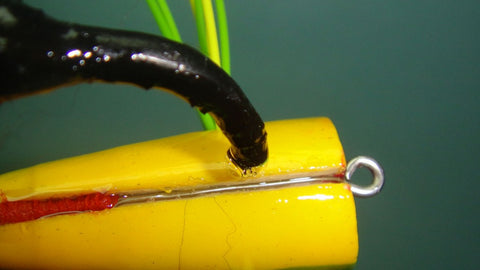
After embedding Shank, fill excess space with an instant epoxy, such as Clear Cure Goo or Bug Bond.
Step 12

Paint over cured epoxy, matching the color of the popper's belly.
Step 13
Go fishing!