Nick's Pick
Nymphs: Step-by-step fly tying instructions.
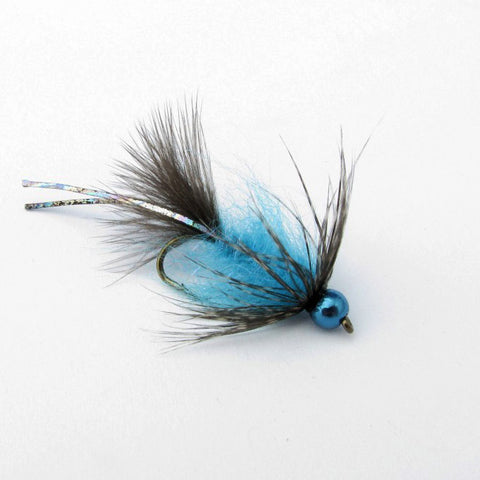
Nick’s Pick created by Vern-O Burm.
Nick’s Pick Volume IV had long been a fly of mine with no real name. That is until I had gotten together with Nick Pionessa at Oak Orchard Fly Shop for a step-by-step photo shoot. I had asked Nick to shoot 2 flies, but I showed up with 3. When we were done Nick mentioned that he really liked the last fly and had mentioned that it reminded him of a fly he tied called the Woody Bugger. From there we compared similarities and differences in the two patterns. He mentioned that though the flies were simple to tie, they both produced fish. We had agreed that the shop could use a few of these flies and I set off on my way home pondering a name for the fly. As a Grateful Dead tune played in my head I remembered the recent commercial releases of live Grateful Dead concerts that were called Dick’s Picks. These were released in volumes. I decided on Nick’s Pick since Nick was so generous with his services and the different colors would be different volumes.
Enough about the name, does it catch fish? The answer is YES! As steelheading goes, they can be persnickety especially when the temperatures drop. There has been a long known “secret” color that steelhead cave into, and that color is blue. There are various theories on why steelhead seem attracted to the color blue, but the only one you need to know, is that it catches fish. If you take an already productive pattern and turn it blue then you have Nick’s Pick Volume IV.This pattern has earned a spot in my fly box and works across a broad spectrum of species.
Fly tying materials
Hook: Daiichi 1560, size 6.
Thread: Danville 6/0, black.
Bead: Nymph-Head® FlyColor™ brass fly tying bead, steelhead blue.
Tail: 2 Coque de Leon Chickabou feathers.
Antennae: Rainbow Shimmer Rubber Legs (optional).
Body: Senyo’s Blue Laser Dubbing (tapered and spun into a loop).
Collar: Coque de Leon Hen Hackle.
Fly tying instructions
Step 1

Place bead on hook and secure into vise jaws.
Step 2
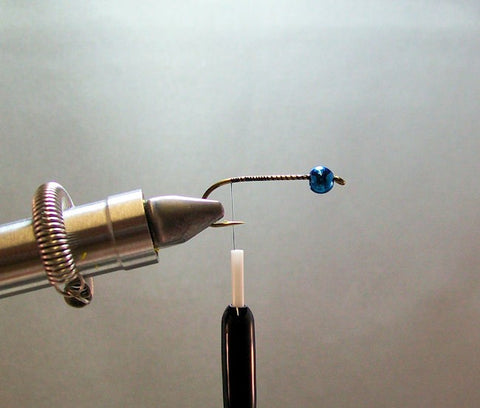
Attach thread and wrap back toward the bend of the hook.
Step 3

Select two Coque de Leon chickabou feathers and remove some of the fluff.
Step 4
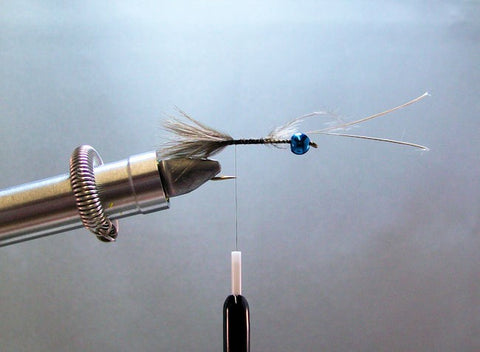
Place the two feathers curved sides facing each other and place them on top of the hook shank and measure them to be a little shorter than the length of the shank. Secure them on top of the shank with your tying thread.
Step 5
Bind down the stems and trim the waste ends with scissors.
Step 6

Attach a rubber leg on each side of the tail so that they are slightly longer than the tail (roughly the length of the shank). Secure these with thread and smooth out the shank with tying thread.
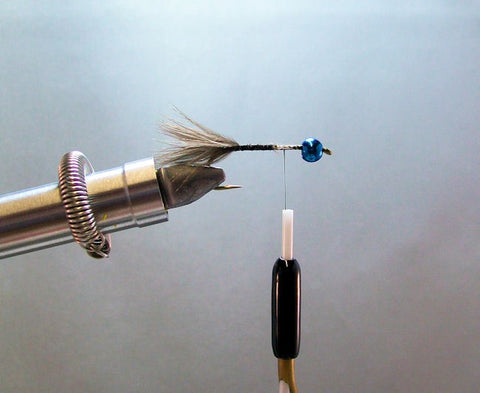
Step 7
Form a dubbing loop using a dubbing twister or Shepard’s hook. Place a small amount of dubbing into the loop. Taper the amount of dubbing from thin to thicker. Remember less is more and it’s easier to add more than to remove more dubbing. Advance your thread forward out of the way and place on a bobbin holder if you have one. This is where having a rotary vise comes in handy. If you don’t have a rotary feature I suggest whip finishing and clipping your thread at this point. This will allow you room to spin the dubbing twister and advance the dubbing loop forward.
Step 8
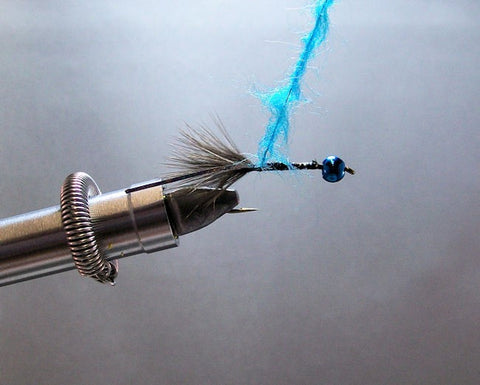
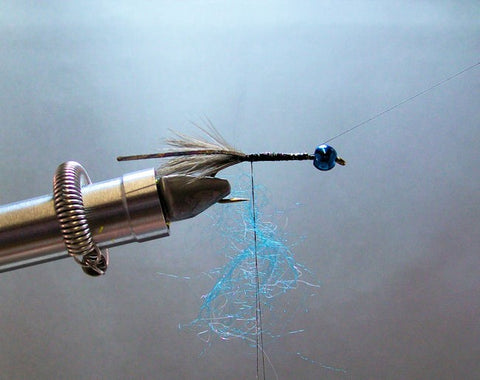
Twist the dubbing twister and form a dubbing rope. Feel free to tease out some of the dubbing to create a nice taper if desired.
Step 9

Wrap the dubbing loop forward as you would chenille. Nice smooth almost touching turns. Stroke back the dubbing with you hand as you advance. Once you reach the area right behind the bead tie off and clip the excess dubbing loop. If you are without a rotary vise I suggest carefully letting the dubbing loop hang and not untwisting. Then reattach your tying thread right behind the bead then lift the dubbing loop and secure with tying thread and trim off excess.
Step 10

Select a Coque de Leon hen hackle. Measure the fibers to extend almost to the point of the hook. Remove the excess fibers and fluff from the stem.
Step 11

Tie in the feather by the stem at a slight 45 degree angle.
Step 12

Take two turns of hackle around the shank directly behind the bead. Take care not to trap any fibers and free up any fibers that want to stick together. Secure the feather with two turns of thread and carefully trim off the excess. Take a few more turns of thread and whip finish. Feel free to pick out or tease dubbing to get a nice buggy look.