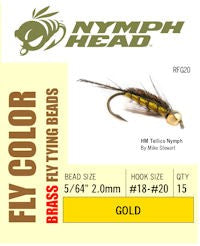
HM Tellico Nymph
Nymphs: Step-by-step fly tying instructions.
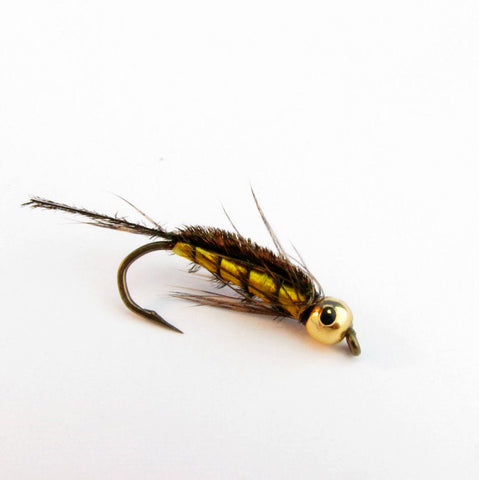
Tellico Nymph created by Mike Stewart.
Fly tying materials
Hook: 2XL nymph, sizes 6-12 (Mustad 9671 size 8 shown)
Head: 5/32 inch Nymph-Head® FlyColor™ brass fly tying bead, gold.
Thread: White, 3/0 Monocord; Black, 3/0 Monocord for final wrap.
Weight: .02 Lead Wire for size 8
Tail: Brown speckled hen hackle barbules
Shellback: Strands of Peacock herl (eight for size #8)
Rib: Peacock herl
Body: Yellow Floss
Legs: Brown speckled hen hackle
Fly tying instructions
Step 1
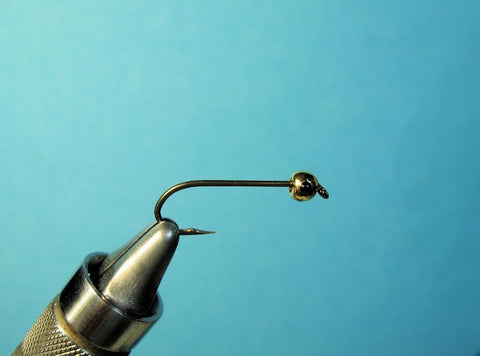
Bend down the barb and insert the point of the hook into the narrow-hole side of the bead. Slide the bead onto the hook shank. Using your favorite Super-glue gel, place a drop of glue on the front portion of the shank and slide the bead over the glue until the bead reaches the hook eye.
Step 2

Wrap 10 turns of .020 inch lead wire around the shank. Slide the wire into the large hole side of the bead. I use Hard as Nails fingernail polish to cement the wire in place. If you use a lead substitute, use 12 turns of the wire.
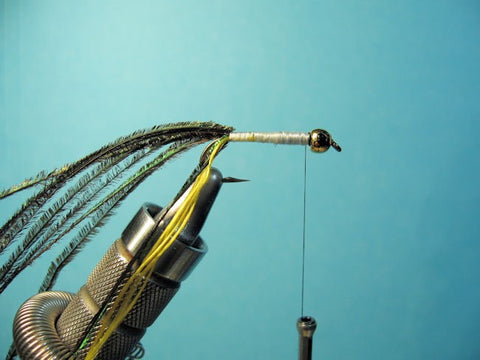
Step 3

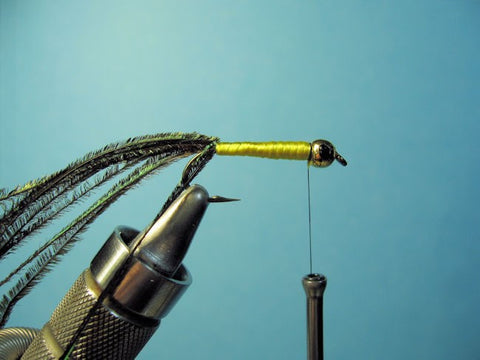
Tie in the white thread and build a taper underbody of thread from the shank to the lead wire. Smooth out the bumps in the lead wrap using the white thread. Bring the thread to the rear of the shank to a point opposite the barb.
Step 4

Tie in the tail where the thread was left at the end of step 3. The tail length should be at least the distance of the hook gap, but not more than half the length of the hook shank.
Step 5

Cut the end of the tailing material and bring the thread forward a couple of wide wraps. Tie in eight strands of peacock herl near the tips.
Step 6

Tie in one strand of peacock herl by the tip. This will become the rib. I like to use a herl that is quite thick with fibers. I tuck the loose end of the herl into the material clip.
Step 7

Take an eight inch length of floss and tie it in at the rear of the shank. In the photo I am using a four-strand floss. The use of a two or single stand floss is just fine. Compensate the length of the floss for the thickness of the floss strands. After you tie a few flies, you will develop a feel for how much you need.
Step 8
Use the thread to make a smooth tapered underbody. Next to the bead, I use a three turn whip-finish knot and cut the thread.
Step 9
Tie in your black thread where you tied off the white thread in the previous step. Wrap the floss forward with slightly overlapping wraps and tie off next to the bead.
Step 10
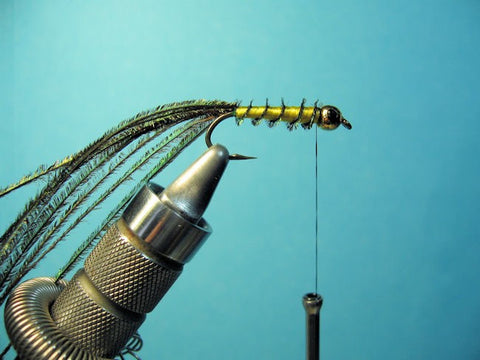
Take the peacock herl that you tucked into the material clip and palmer wrap as a rib over the floss body. Tie off next to the bead. Five or six evenly spaced wraps will do nicely.
Step 11

Take a hen hackle. Cut off the part of the feather that has all that fluff and discard. We will be tying the hackle in by its tip. Find a spot on the hackle where the barbs are about 1-1/2 times the hook gap in length. Stroke the fibers towards the butt end of the feather. I usually moisten my finger tips to encourage the fibers to stay stroked. You will be left with the tip of the feather where the fibers are not stroked back. Cut the very end of the tip leaving a length slightly less than ¼ inch. You should be left with a triangle shaped tip. I then take my scissors and cut the fibers next to each side of the feather stem. But don’t cut too close! I cut the fibers such that some parts remain attached to the stem. This enables the thread to get a better purchase when you tie in the hackle by its tip. Place the hackle with the tip to the right and the bright side facing you. Tie in the tip in back of the bead.
Step 12

Wrap the hackle one turn only around the hook and tie off. We need sparse legs here. Stroke the hackle fibers down and to the rear. Sometimes one turn of thread will help with this.
Step 13

Take the herl and pull it forward over the body forming the shell-back, and tie off at the bead using a five turn whip finish knot. Carefully place a small drop of head cement on the thread.
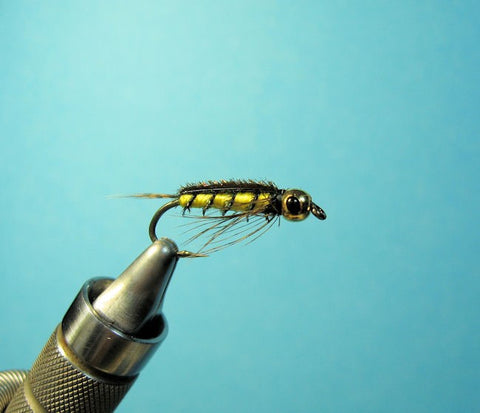
The finished fly.