Evolution Mayfly Swimmer
Nymphs: Step-by-step fly tying instructions.
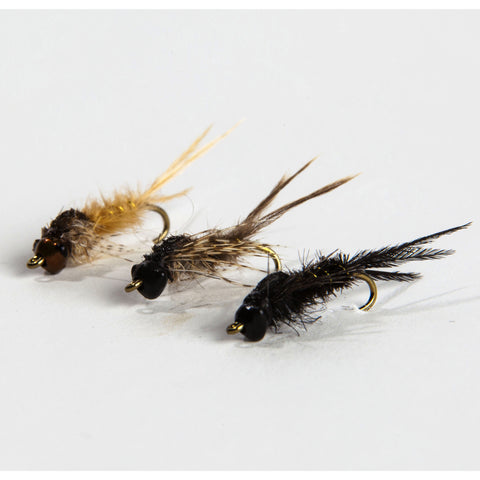
The Evolution™ Mayfly Swimmer is inspired by Shane Stalcup’s Gilled Nymph and accurately imitates most gilled swimming mayfly nymphs.

Color variations
Gray, black, and tan.
Fly tying materials
Head: Nymph-Head® Evolution™ Mayfly Swimmer & Burrower tungsten beadhead, black (for gray and black variations) or brown (for tan variation), small or medium.
Hook: Curved nymph hook 3XL; #12 for medium bead, #14 or #16 for small.
Thread: Gray, black, or tan.
Rib: Ultra wire, gold.
Tail: Ostrich herl; gray, black, or tan.
Abdomen: Ostrich herl; gray, black, or tan.
Thorax: Hareline Hare's Ear PLUS Dubbin; Hare's ear, black, or tan.
Wingcase: Pheasant tail; natural, black, or brown.
Legs: Partridge feathers; natural.
Fly tying instructions
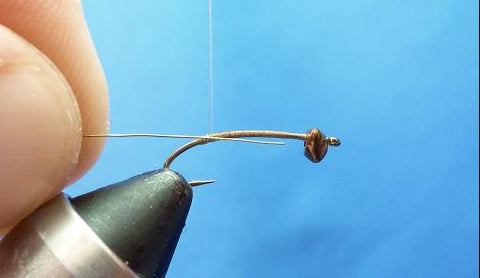
Step 1

Slip Evolution beadhead onto the hook and position hook in vise. Attach tying thread and wrap base layer of thread onto hook shank.
Step 2

Tie in a strip of ultra-wire for the ribbing of the abdomen. Make sure the wire is completely covered with thread and is positioned underneath the hook shank.
Step 3

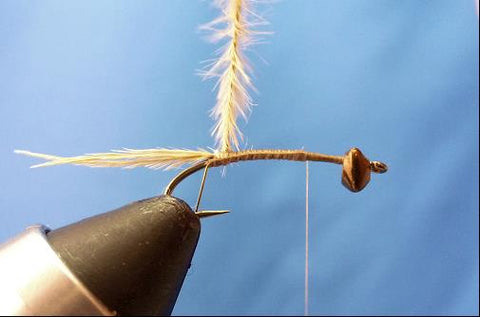
Select three ostrich herl tips for the tail. Tie them in by lifting the strands of the herl and move your thread forward.
Step 4
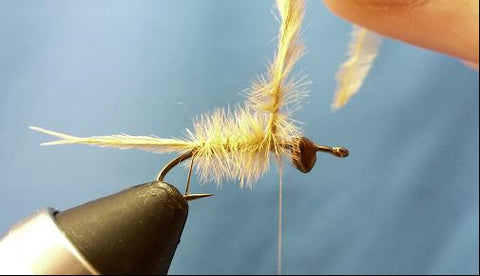
Twist the remaining ostrich herls together to form a rope, and wrap the rope forward to create the abdomen.
Step 5
Tie off and trim the excess ostrich herl.
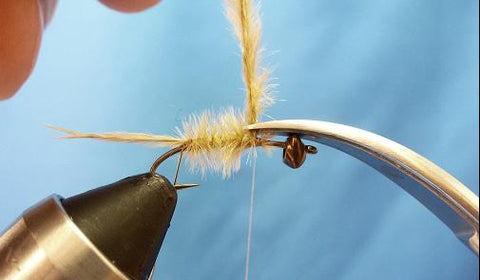
Step 8

Wrap the ultra-wire forward in the reverse direction and rib the abdomen. Tie off.
Step 9


Carefully trim off the top and bottoms of the ostrich herl. The remaining ostrich herl on the sides of the fly represent the gills of a swimming mayfly.
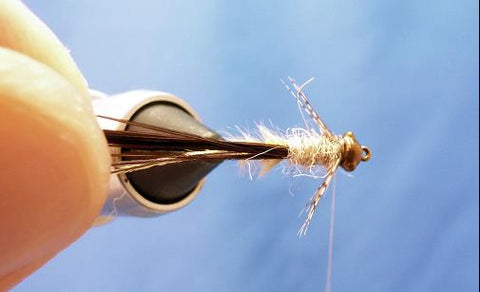
Step 10


Tie in pheasant tail fibers for the wingcase of the fly.
Step 11


Use dubbing to create a neat, tight thorax.
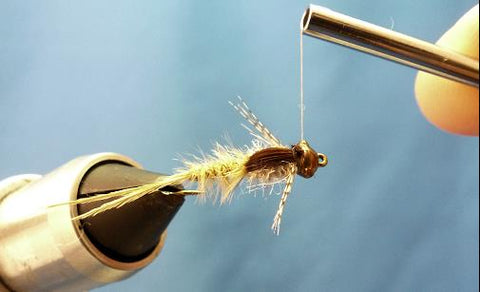
Step 12

Prepare a single partridge feather to be tied in for the legs.
Step 13

Position the partridge feather as shown.
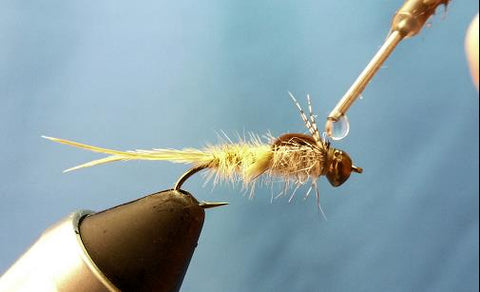
Step 14

Hold the partridge feather in place with your left hand. Then, with your right hand make several wraps of your thread directly behind the bead to secure the feather in position.
Step 15

Pull the pheasant tail fibers forward and over the thorax to create the wingcase.
Step 16

Tie off the wing case directly behind the beadhead using several thread wraps.
Step 17
Trim off the excess pheasant tail. Use several strong thread wraps to secure in place.
Step 18
Tie off the thread and add head cement.
Step 19

Go catch a big fish!