Evolution Caddis Pupa
Nymphs: Step-by-step fly tying instructions.
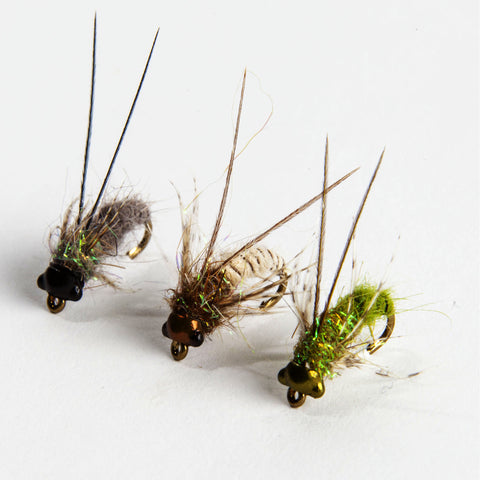
The Evolution™ Caddis Pupa is a realistic imitation enhanced with the new Nymph Head® Evolution™ Caddis tungsten beadheads.

Color variations
Cream, gray, and green.
Fly tying materials
Head: Nymph-Head® Evolution™ Mayfly Clinger & Crawler tungsten beadhead, brown (for cream variation), black (for gray variation, olive (for green variation), extra-small or small.
Hook: Curved caddis/nymph hook; #14 for small, #16 or #18 for extra-small.
Thread: Cream, black, or olive.
Rib: Ultra-wire; brown, black, or brown.
Antennae: Pheasant tail; brown, black, or brown.
Abdomen: Standard Dubbing; cream, gray, or caddis green.
Thorax: Hareline Hare'e Ice Dubbin; brown, black, or olive/brown.
Legs: Partridge, natural.
Fly tying instructions
Step 1


Slip Evolution beadhead onto the hook and position hook in vise. Note: this is the correct position for the beadhead. The thick part of the bead is on the top of the hook shank.
Step 2

Attach the tying thread directly behind the beadhead and lay a base of thread over the entire hook shank.
Step 3

Select a strand of ultra-wire and tie it in on top of the hook directly behind the bead.
Step 4

Tie the ultra-wire in along the top of the entire length of hook shank.
Step 5


Dub a buggy abdomen.
Step 6

Wrap the ultra-wire forward to create the ribbing.
Step 7

Dub the abdomen using a darker color dubbing.
Step 8

Dub a nice, buggy thorax.
Step 9


Use a partridge feather for the legs of the caddis fly.
Step 10

Pull the feather gently to get the legs the right length.
Step 11


Tie in 2 antennae of the fly using pheasant tail fibers. The antennae should be roughly twice the length of the hook shank.
Step 12

Wrap a few more turns of dubbing over your thread wraps to finish the head of the fly.
Step 13

Tie off the thread and add head cement.
Step 14


You're done! Go catch a big fish.