Berg's Caddis Larvae
Nymphs: Step-by-step fly tying instructions.

Created by Ed Berg.
Caddis Larvae patterns go back for many years of fly fishing using everything from leather to dubbing. All were effective, but I was looking for something to appeal to today's more sophisticated fish. When I began designing the fly the first problem was finding a material with the correct color. I needed the cream color of a natural grub. There were many materials that were white or tan, but almost none a true cream. Rainey's natural latex gave me the color I was looking for. Stretching the turns gave me the taper I was looking for, but would not retain the difference in tension for long. Adding the Softex was the answer. This held the turns in place, gave added protection to the latex, and slightly filled in between the turns, giving a more realistic appearance. The fish have approved enthusiastically! Smaller sizes can be tied, matching hook, material and bead to suit. I sometimes color the body with a green marking pen to imitate the Rhyacophila caddis. Fished deep and dead drift, this nymph pattern is deadly in every stream I have fished it from California to Colorado. Here's how to tie Berg's Caddis Larvae.

Fly tying materials
Hook: #10 scud TMC 2488 or Dai-Riki 125.
Bead: Mayfly Brown 1/8” (3.2 mm) Nymph-Head Heavy Metal™ tungsten bead.
Thread: 3/0 white.
Body: Rainy’s Large natural Round Rubber Legs.
Body Coating: Softex clear flexible coating.
Fly tying instructions
Step 1
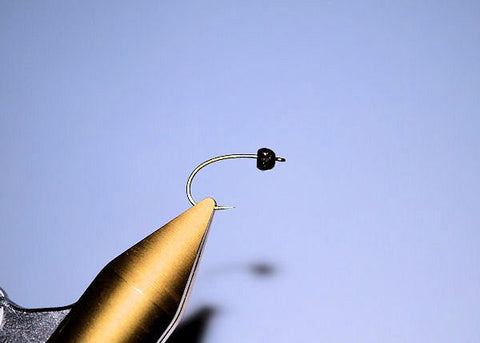
Place a 1/8” Mayfly Brown Tungsten Nymph-Head bead on a #10 scud hook and mount in a vise.
Step 2

Start the 3/0 tying thread just behind the bead. Wrap several turns of thread and push into the bead cavity to stabilize the bead.
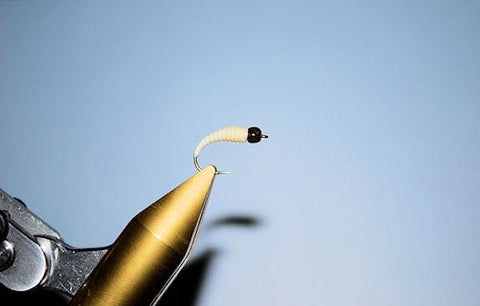
Step 3

Tie in a length of Rainy’s natural Round Rubber Legs (Large) just behind the bead. This will be the body material.
Step 4

Stretching out the material, wrap tightly down over the bend of the hook. Return the thread to behind the bead creating a smooth underbody.
Step 5

Stretch out the body material and begin wrapping up the hook. Gradually release the tension on the material as you wrap. This will create the taper to the body.
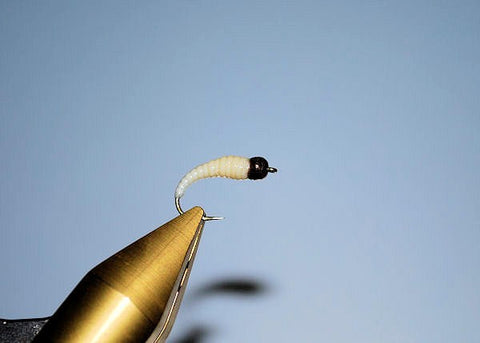
Step 6
Tie off the material just behind the bead and cut off. Whip finish the thread and cut off.
Step 7

Liberally coat the entire body with Softex clear flexible coating.
Step 8
The fly may be fished very effectively as is.
Step 9
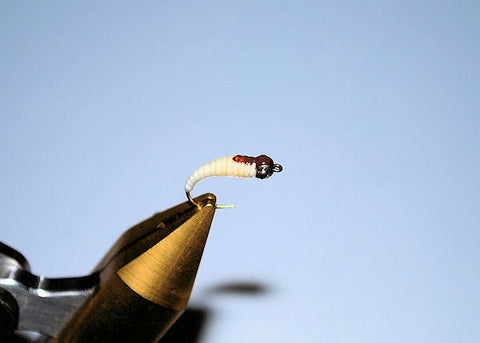
For a more realistic imitation of the Hydropsyche Caddis, touch up the first few shoulder sections with brown acrylic paint.